Cleaning Paintings: Dusting

The first step in cleaning a painting is removing loose dust and dirt. This can be accomplished with brushing, dusting, or vacuuming. Further cleaning may require using dry cleaning materials and aqueous cleaning methods.
Keeping dust and dirt off paintings will help preserve their appearance and minimize the chances of particles becoming permanently embedded in paint films. While dusting paintings can be risky, you should be able to undertake this task using the following guidelines. Please note that these instructions are for well-bound paint films only. If you are unsure about the condition of your painting or if it contains powdery paint or other loosely bound components, seek advice from a professional conservator before commencing dusting.
Tools
The best tool for dusting a painting is a soft paintbrush, such as the one in Figure 1. It should be a flat brush approximately 2–3 inches (5–8 cm) wide with 2-inch (5 cm) long hairs. The brush hairs should be soft and flexible; goat hair or soft synthetic brushes work well. A good test for the suitability of the brush is to try it on the inside of your wrist: you should not feel any individual bristles, and the action should not be too floppy or too stiff. If the brush has a metal ferrule, wrap the brush ferrule in several layers of masking tape to dull any sharp edges in case it comes in contact with the paint surface (Figure 2).
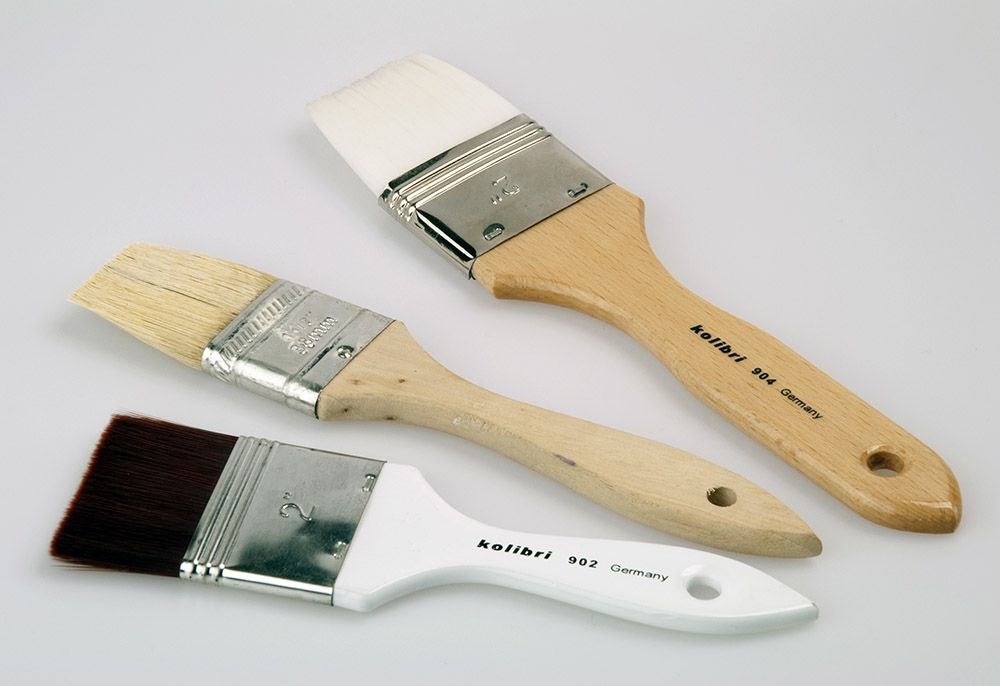
Figure 1. Soft-haired brushes for dusting paintings.
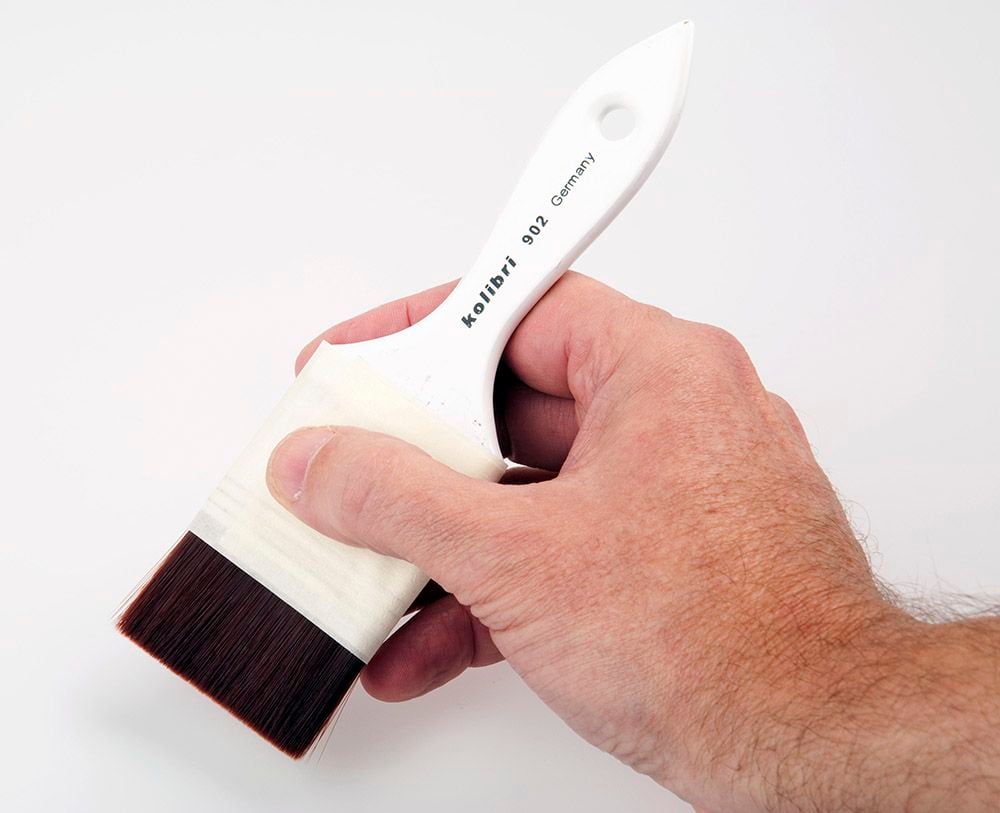
Figure 2. Wrap several layers of masking tape around the ferrule to eliminate hard edges.
A vacuum cleaner with a long hose attachment is also helpful in capturing dust from a safe distance. Cover the nozzle of the hose with cheesecloth and tape it securely into place (Figure 3).
Before dusting, examine the surface of the painting thoroughly with a bright light. Hold the light to one side, allowing it to rake across the surface to show the surface texture and any loose or raised paint fragments. Scrutinize the entire surface. If you see any raised fragments or areas that look powdery or loose, do NOT dust the painting, as brushing could damage these areas. If everything looks intact, proceed with caution.
Dusting Procedure
Set up the light to illuminate the work area. Turn on the vacuum cleaner and hold it approximately 12 inches (30 centimeters) from the surface with one hand. Grasp the brush in your other hand, holding it around the base of the tuft. This may feel odd, but it will help keep the ferrule's hard edge from scratching the paint. Starting at the top, lightly draw the brush along the top edge of the painting. If the picture is unframed (often the dirtiest part), brush lightly outward from the painting and towards the vacuum nozzle. Then, on the front surface of the painting, brush in short strokes: down first, then across, down, and across until that section of the painting is completed.
Figure 3. Dusting and vacuuming a painting.
If paint flakes or material come loose, trap them on the vacuum nozzle's fabric. Save these in a safe place (a resealable sandwich bag serves this purpose) and contact a conservator as soon as possible. If you are in any doubt about the condition of the painting, stop dusting and contact a conservator for advice.
Brushing a painting with a matte surface (lean in a binder or loaded with pigments) may burnish the painting and leave an undesirable glossy, permanent imprint. In this case, brushing should be avoided.
Next Part: Dry Cleaning
References
Caring for Your Paintings. Smithsonian Museum Conservation Institute: https://www.si.edu/mci/english/learn_more/taking_care/care_painting.html
“Cleaning Paintings: Precautions”. CCI Noes 10/1. Canadian Conservation Institute. https://www.cci-icc.gc.ca/resources-ressources/ccinotesicc/10-1_e.pdf
Ormsby, Bronwyn; Stephen Hackney; Patricia Smithen; Tim Green; Tom Lerner; Eric Hagan and Joyce Townsend (2007) Caring for Acrylics: Modern and Contemporary Paintings, DAXA Art and the Tate Gallery.


